Archive | Ingredients RSS feed for this section

Chocolate Puffs – ‘rough side upwards’

16 Sep

IMG_0107

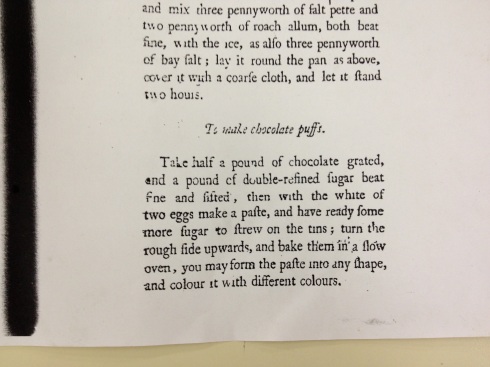
Hannah Glasse’s Chocolate Puffs recipe


It was more chocolate experimentation this week at Fort York.  This time we were working with Hannah Glasse’s 1800 Chocolate Puffs recipe from her book The Complete Confectioner. A puff brings to mind something light, airy, even ethereal.  Among Dr Johnson’s many definitions for the word puff he includes ‘any thing light and porous’.  It was difficult to see how the recipe’s call for a pound of sugar (even if it was double refined) and a half a pound of grated chocolate mixed together with the white of two eggs might ever achieve this status.


18th century recipe books contain  a number of different recipes for puffs.  You can find apricot puff, almond, puffs, lemon puffs, curd puffs and German puffs.  These latter were created from a mixture of milk, flour, egg yolks and sugar, flavoured with rose water, nutmeg and lemon and then fried in boiling lard, to be covered in Sack for a sauce.  I have never seen any before but the recipe’s planted in my mind a vision of a bite sized boozy doughnut.


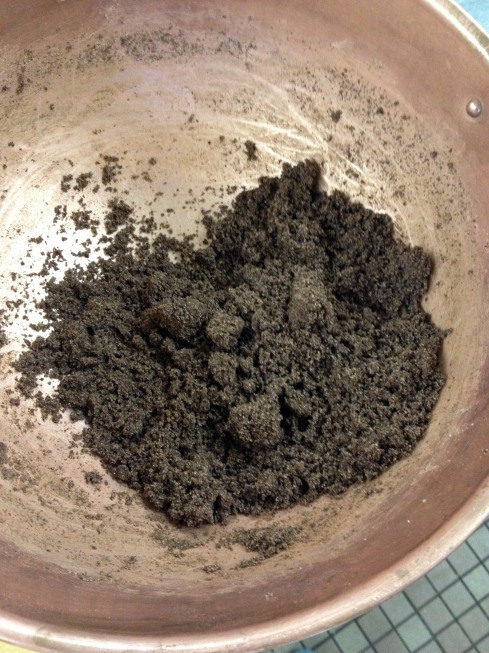
Other volunteers at Fort York have made the most delicate and light lemon puffs, morsels of sugary heaven.  Our first attempts at chocolate puffs confirmed that we were dealing with a very different type of recipe.  First, The grated chocolate and sugar were mixed together and then the two egg whites were added.  But far from creating a paste which the recipe suggested would emerge we were left with a grainy mixture which resembled wet sand in texture.  How were we to create any sort of shape from this?  And it was clear from the recipe that the mixture was meant to be malleable; it says ‘you may form the paste into any shape’.  We were going to be lucky if we were able to get the mixture from the bowl to the baking tray, let alone have the luxury of choosing what form it would take.  For our first trial we simply heaped the ‘wet sand’ into little mounds (about 2cm across) and baked them at 300ºF for 15 minutes.  After leaving them to cool (not easy to do when you’re curious to try) we sampled the results.  The outside had a pleasingly crunchy and granular texture, a little bit like a chocolate sugar cube.  However, we weren’t convinced that this is what they were meant to be like.

 IMG_0102

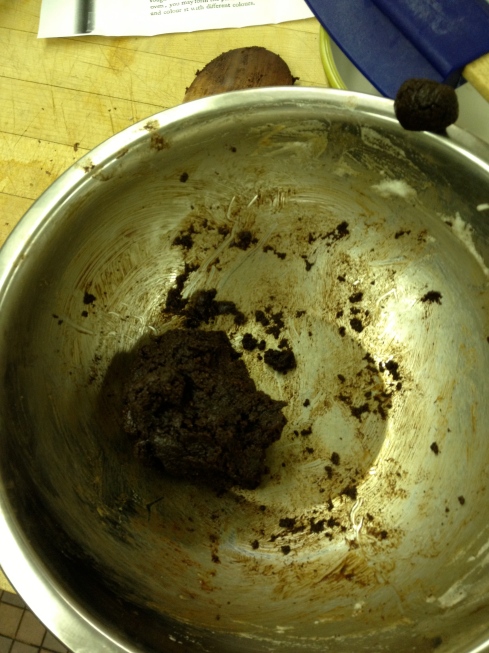
the wet sand mixture of a pound of double refined sugar, half a pound of grated chocolate and two egg whites

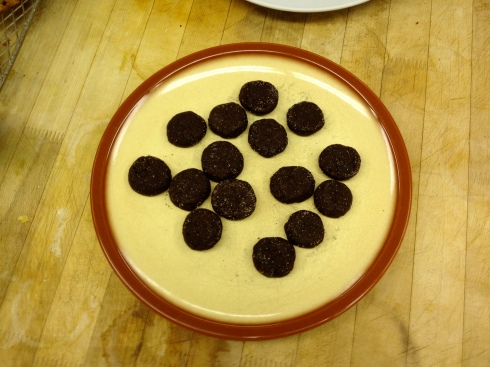
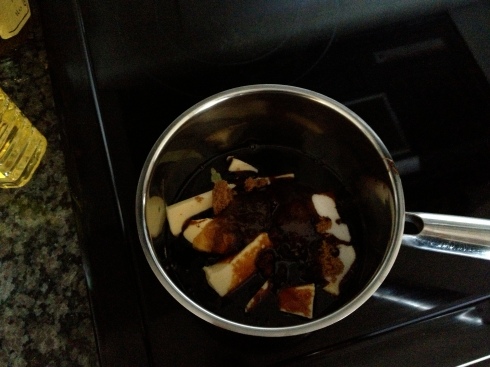
The next experiment involved thinking about how we might possibly create a paste from the quantities mentioned in the recipe (no tampering with the proportions or adding extra ingredients!) Since the mixture was clearly very dry we decided to try melting the chocolate.  The sugar was then added to the melted chocolate and with the beaten egg white folded in at the end.  This created a very thick paste, but it was at least a paste and it was possible to use it to create shapes.  We opted for small, simple rounds.  Another part of the recipe which had been bothering us was the instruction to place the shapes ‘rough side upwards’ on the tins strewn with sugar.  This had led me to thinking about trying to create the shapes by using a mould (see the continuation of this thought below) but I suddenly had the idea that this instruction might mean that you were meant to place your puffs on the sugared baking tray and then turn them over ‘rough side upwards’ so both sides were covered with sugar.  This is what we tried and cooked these at 300ºF, leaving some in for 15 minutes and some in for 20 minutes. The results this time were no more light and airy.  They had a hard edge and a slightly chewy centre, with a hint of the granular still in the structure of the biscuit, as well as the sugar on the outside.

 IMG_0101

Making a paste by melting the chocolate

IMG_0105

The rounds from the melted chocolate recipe

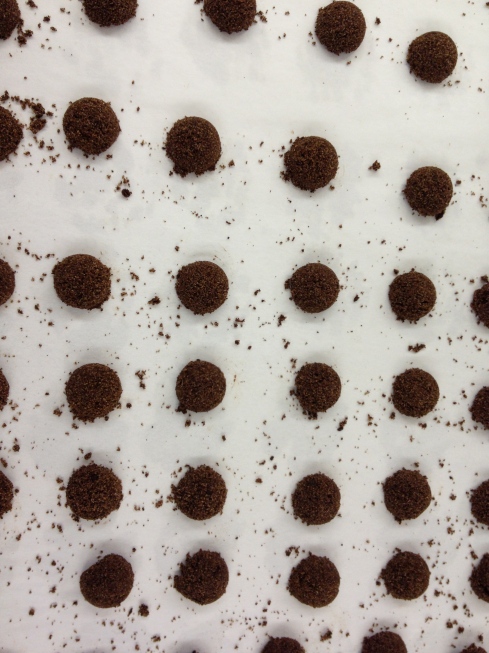
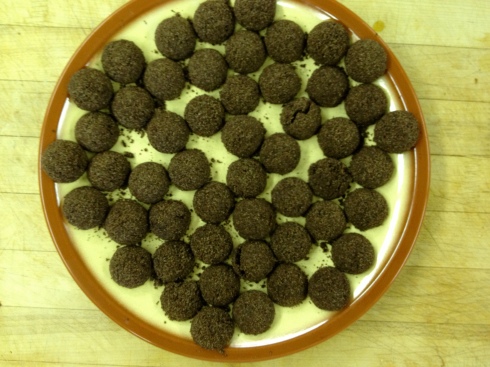
The final method we tried involved my thought about creating the puffs in moulds.  I think at this point the trial became a little less than historically accurate but I wanted to see what would happen if the ‘wet sand’ mixture was shaped using a mould.  Since there were no small mould shapes at the Fort I improvised with a measuring teaspoon which was a half sphere and about 3.5cm in diameter.  Since the mixture was like sand this felt a little bit like making very miniature rounded sand castles and my first attempts were far from perfect.  If I didn’t pack the mixture in tightly enough it simply fell apart.  But if I packed it in too tightly I then needed to knock it out too viciously and ran the risk of squashing it as I tried to prise it from the spoon.  Finally I had a whole tray of these dark little mounds to bake and again they went in at 300ºF for 20 minutes.  When they came out of the oven they reminded me of stylised hedgehogs; there were just enough of the granular on the surface to give them a roughened texture and the uniform shape gave them a particularly pleasing appearance.  This final experiment seemed to be the preferred one in terms of edibility too.  Melting the chocolate may have allowed us to create a paste but the resulting puff was not as successful as those made from the more unwieldy mixture.

 IMG_0104

Miniature sandcastles turn into ….

IMG_0106

…..hedgehogs

This got me to thinking about whether the word puff refers not to the texture of these sweetmeats, as in Johnson’s light and porous, but to the shape, or something that was simply a mouthful?  All three of our experiments had a very solid and dense structure, nothing light and airy at all.  The proportions of ingredients in other 18th century chocolate puff recipes suggest something lighter than Hannah Glasse’s version.  For example the version that appears in Elizabeth Raffald’s, 1769 Experienced English Housekeeper, and others:


To make Chocolate Puffs
Beat and sift half a pound of double-refined sugar, scrape into it one ounce of chocolate very fine; mix them together. Beat the white of an egg to a very high froth, then strew in your sugar and chocolate, keep beating it till it is as stiff as a paste. Sugar your papers, and drop them on about the size of a sixpence, and bake them in a very slow oven.

(the British Museum have a modern version of this recipe on their Young Explorers pages – what a great way to get children into cooking)


These would still be much more dense than the floating melt-in-the-mouth lemon puffs in Raffald’s book which use the juice of two lemons, 1 egg white and 3 eggs to a pound of sugar.


So, some success with the chocolate puffs but room for further investigation.  Of course how close our 21st century ingredients are to those used in the 18th century.  And we haven’t even got round to trying to ‘colour it with different colours’ as suggested at the end of the recipe.
Image

Bruising Chocolate

4 Sep

image[2]

J Bell’s Chocolate Biscuit recipe from The French Family Cook

Today was a rather quiet and calm kitchen at Fort York.  Mya was keen to try a 1793 recipe for chocolate biscuits from J Bell’s The French Family Cook: Being a Complete System of French Cookery.  This recipe involved no butter so it suggested a biscuit in the French manner, like a Naples or Savoy biscuit.  It also called for the ounce and a half of chocolate to be ‘bruised very fine’.  I was intrigued by this instruction not least because I was sceptical that solid chocolate could be easily ‘bruised very fine’.  What exactly did the instruction mean?  Mya and I decided that it probably meant that the chocolate should be beaten using a pestle and mortar.  I began by cutting up the blocks of Baker’s unsweetened baking chocolate    which we were using with a knife.  This chocolate conveniently comes in wrapped ounce blocks which are divided in two so I put one half block in the small brass mortar at a time and began to grind and beat it down.  I was impressed that it did begin to produce something like a powder, fine beads of the dark chocolate.

Having pounded for a good number of minutes I sieved the first round of chocolate to get it as fine as possible.  Back went the larger lumps for another beating.  With each of my three blocks this process was repeated at least three times and I think to create this mere ounce and a half of bruised chocolate took me something like an hour!  Not a technique or recipe I shall contemplate using on a regular basis.

image

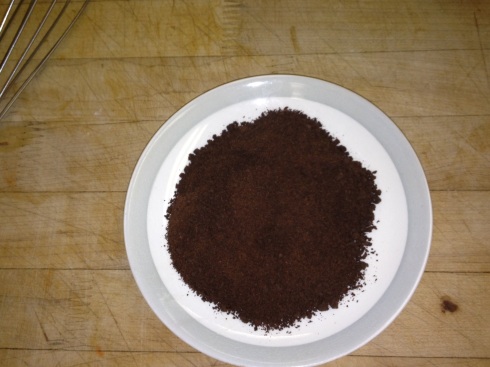
All in an hour’s work – my efforts at bruising chocolate very fine

As I say I found the use of the term ‘to bruise’ fascinating.  It conjures up images things being bodily damaged and battered both in the sense of bruising the human skin and the bruising of fruit.  In general the idea of bruising has a less than positive association.  As I was pounding the chocolate I was reminded of a classic example of the negative connotations of bruising, the King James translation of Genesis 3:15, when God tells the serpent after he has tempted Eve

‘And I will put enmitie betweene thee and the woman, and betweene thy seed and her seed: it shal bruise thy head, and thou shalt bruise his heele.’

I decided to see if Dr Johnson could offer a helpful 18th century perspective on a definition of ‘to bruise’ and sure enough his 1755 dictionary gives the following description for the verb:

‘To crush or mangle with the heavy blow of something not edged or pointed; to crush by any weight; to beat into gross powder; to beat together coarsely.’

What interested me was that this definition wasn’t simply ‘to bruise’ as in the sense of smashing and damaging but also in the sense of creating a powder which suggested perhaps a more productive outcome. The OED didn’t provide any further elaboration on this idea of creating a powder by bruising ingredients and merely noted one definition of ‘to bruise’ as ‘To beat small, pound, crush, bray, grind down‘.  However it did add in brackets after its definition of ‘to bruise’ as breaking something down or into pieces (a use it points out is now obsolete) that in this sense it was apparently French.  Perhaps Bell’s description of the way to prepare the chocolate was more French than English.

In my cursory exploration through some 18th and 19th century cookbooks there were few uses of the term ‘to bruise’ for preparing ingredients and when it did occur it either referred to bruising fruit for jam making (Nutt, 1789) or bruising caraway seeds for a cake (MacDonald 1809).  Neither quite as exotic (or time consuming) as bruising chocolate for biscuits.

After I had finally bruised my way through the ounce and a half of chocolate it was time to combine it with the other ingredients. The fine beads of chocolate gave the resulting mixture an appearance almost like a very delicate Stracciatella ice cream mixture.  It was also a very runny and Mya and I were unsure how it might behave once spooned onto the paper.  We went for fairly small penny sized biscuits and baked them in a 325˚F oven for 15 minutes.  The results of this first batch were not bad but we had forgotten to sprinkle the sugar on top and decided that they would benefit from being more crisp.  To help us achieve this we made the next batch slightly smaller in size and left them in for longer  – 20 minutes this time.  The results were definitely improved.  For the third and final batch we gave them 25 minutes and these were even better.  The chocolate taste was subtle but definite and the crispness of the final batch suggested that they would be the perfect accompaniment for an after dinner coffee.

image[1]

The finished biscuits; small, crisp and very tasty!

We didn’t try spooning any of the mixture into a buttered paper case as suggested by the recipe.  Ivan Day has written a great blog post about cakes and paper cases but we didn’t have the right materials to trial this approach for the chocolate biscuits. It’s an experiment that will have to wait for another day.  Mya and I have agreed however, that however noble our attempts historic chocolate bruising, next time we might try the recipe with grated chocolate.  I wonder if anyone would notice the difference?

A Young Ladies’ Guide to gingerbread making

21 Apr

IMG_5693

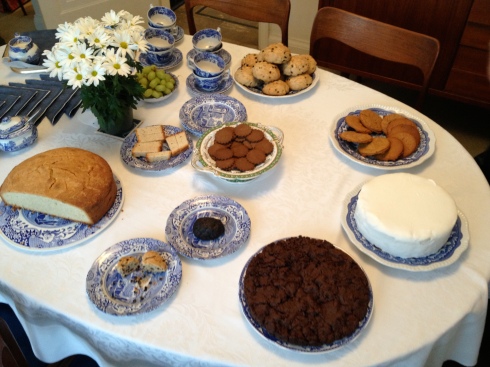
a sample of cakes and biscuits baked from Elizabeth Marshall’s Young Ladies’ Guide; it includes Amy’s beautifully iced rice cake on the far right and Mya’s almond cake on the far left

Over the last few months some of the Toronto historic cooks have been meeting up to sample each others attempts at recreating recipes from various 18th and 19th century cookbooks.  The sessions have been generously hosted and ably organised by Mya, whose dedication to historical accuracy and passion for pratical problem solving in the kitchen is the perfect combination for following in the footsteps of the cookbook writers of the past.  We’ve been concentrating on cake and biscuit recipes and so far we’ve looked at Duncan MacDonald’s The New London Family Cook (1808), Mrs Dalgairn’s The Practice of Cookery (1841) and Richard Briggs’ The English Art of Cookery According to the Present Practice (1798). This month’s text was The Young Ladies’ Guide in the Art of Cookery, Being a Collection of useful Receipts Published for the Convenience of the Ladies Committed to her Care by Elizabeth Marshall in 1777.  As someone who attended a Ladies’ College (worlds apart from Mrs Marshall’s establishment I’m sure) I was particularly pleased to have the chance to look more closely recipes from this book, even more so since Mrs Marshall ran a school near Newcastle-upon-Tyne, a part of the world I know and love.


According to her Wikipedia entry Mrs Marshall was born in Northumberland in 1738 and ran a cookery school in Newcastle between about 1770 and 1790.  In her introduction to The Young Ladies’ Guide she explains that she has compiled the cookbook ‘at [the] … urgent and frequently repeated request’ of her students who wanted ‘an assistance of this sort to [their] … memory’.  As such it offers a fascinating compendium not only of 18th century recipes but the sort of recipes that ‘young ladies’ might be expected to know how to make. The cake and biscuit chapter contains staples of the 18th century kitchen like a seed cake, fruit cakes, queen cakes, Shrewsbury cakes and macaroons but also has some less common inclusions.  We were all intrigued by Spaw Biscuits until the Oxford English Dictionary and Dr Johnson solved the riddle; the definition in Johnson’s dictionary reads ‘[from Spaw, place in Germany] a place famous for mineral waters; any mineral water’, ie. a biscuit to help to take away the taste of nasty, sulphurous mineral water, that you might drink in a spa town.  We wondered about the taste of Musk Cakes, using one grain of musk, and on exactly what sort of occasion Corporation Cakes might have been eaten (did towns celebrate their day of coporation?).


One spice which Mrs Marshall includes in a number of her recipes (including the one for Spaw Biscuits), is coriander seed and I was curious to know what it would taste like in a gingerbread cake recipe so this is the one I decided to attempt.


To make little Gingerbread Cakes


‘Take two pounds and a half of flour, a pound and a quarter of treacle, half a pound of butter, half a pound of fine sugar, one ounce of coriander seeds, ditto of beat ginger and carraway seeds; beat your seeds and mix them with your ginger, melt your butter, sugar, and treacle; then make it into a stiff paste, roll them pretty thin, and cut them with a drinking glass bottom: Bake them in a slow oven’.

IMG_5688

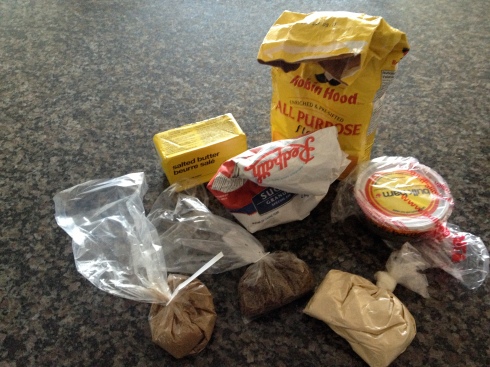
my ingredients for little gingerbread cakes

I was particularly interested to find out how the taste combination of ginger, caraway and coriander might work. Mya explained that coriander was a spice more commonly used in the earlier centuries and gradually caraway became more popular so in some ways this recipe marks a transition point, combining the older spice with its newer and more favoured rival.  It was interesting to see too that Mrs Marshall’s pepper cake recipe used the same mix of spices, caraway, coriander and ginger, no pepper as the title might suggest (but then gingerbread recipes with no ginger were common too, the names just suggesting a spiced cake of some sort).


While Mrs Marshall might have praised my enthusiasm my actual experimentation was far from the perfection I suspect she might have hoped from her young ladies.  I decided that I would reduce the quantities in half – these 18th century recipes always seem to use such large amounts. This was part one of my downfall.  Still being in a kitchen equipment limbo with some utensils in the UK, some in storage and some in Canada raised other challenges.  I had to improvise my pestle and mortar by quite literally beating my caraway and coriander seeds with a rolling pin in a plastic bag. (well, I admit, I first tried to pulse the caraway seeds in a mug with our hand blender but only succeeded in scattering them to the four corners of the kitchen)  Then I looked at the coriander seeds and wondered if an 18th century cook would have used them with all the chaff left in?  Was I meant to remove it, or was it simply because I hadn’t beaten my coriander seeds for long enough?  (sometimes 18th century instructions have some very long times for beating or stirring things – for example the recipe for the Rice Cake calls for you to beat the ingredients all together for a full hour!) Since I wasn’t sure about the coriander chaff I left it in.

 IMG_5689

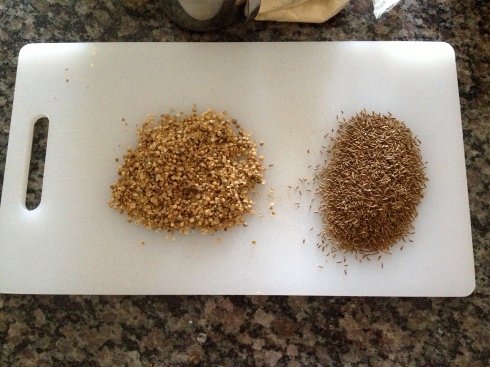
my beaten coriander and caraway – as you can see beating seems to have little effect on caraway

IMG_5690

melting the butter, sugar and treacle

Now this is the bit of the story where my recipe really begins to deviate.  I had checked my cupboards to make sure I had all the ingredients but clearly not well enough.  My first failure was with the white sugar. Here I was just a tiny bit short so I added a bit of brown sugar, reasoning that as the recipe called for butter, treacle and sugar to be melted it wouldn’t make too much difference. Then I discovered that the treacle which I’d weighed and of which thought I had enough was about an ounce short.  What would the disorganised 18th century housewife have done I wondered?  She wasn’t about to throw away her precious mixture of expensive ingredients.  A quick survey of my cupboards offered up honey and golden syrup.  Since the latter wasn’t an option for the 18th century cook I decided to add some honey to make up for the shortfall.  But it was only when I came to add the mountains of flour that I realised the real issue; I had calculated that I needed 9 ounces of treacle, when of course half of 1 ¼ lb is actually 10 ounces.  That would explain why the mixture was almost impossible to bind together.  Again I was determined not to be entirely defeated and so added a little more of my honey in order to get a mixture which would actually stick together.  By now of course it was probably far removed from the original and the recipe’s instruction to ‘roll pretty thin’ the dough wasn’t easy to follow.


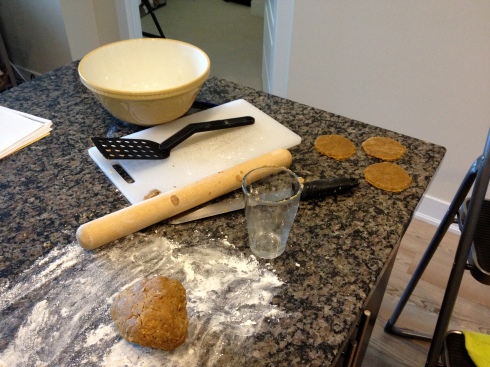
The next thing I had to do was to ‘cut them with a drinking glass bottom’.  Now most drinking glass bottoms I’ve looked at are not well designed to use as a biscuit cutter; it’s their top lip that’s far more suited. I decided that perhaps this instruction had to be taken with a practical pinch of salt.  Once you turn the glass upside down to use it, the top is actually the bottom (in the same way descriptions of shoes traditionally discuss the sole first, as this is the way the shoe would be placed on the shoemaker’s bench).

 IMG_5692

cutting out with a drinking glass bottom – you’ll notice that my dough does not look at all pliable!

The recipe called for the cakes to be cooked in a slow oven.  Feeling a little unsure about how hot this would be I cooked the first batch at 325 degrees for 15 minutes; I then tried reducing the temperature to 300 degrees as I felt that they might be cooking a bit too quickly.  And in the end all my ‘cakes’ were very hard, a danger to dental work, and quite dark in colour.  The taste however was good.  I don’t know if all this historic cooking is altering my palette but the more caraway I taste the more I enjoy it.  I found it difficult to taste the coriander in the finished biscuit but the combination of spices worked well.  And if the biscuits were to be eaten with a fortified wine then maybe a hard texture wouldn’t have been so bad.  (I’ve now come to the conclusion that if in doubt about when an historic cake or biscuit was meant to be eaten consider the ‘cakes and ale’ principle and indeed so many of these recipes produce something that would work beautifully with something a little stronger than water)

 IMG_5695

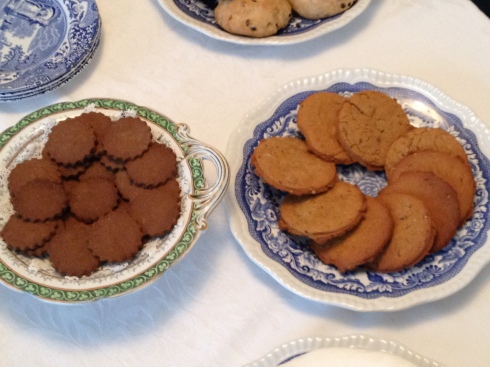
two versions of the little gingerbread cakes – Rosemary’s are on the left and mine are on the right

Interestingly Rosemary had tried the same recipe as me so we were able to compare our results.  Rosemary’s gingerbread cakes were much thinner and darker (but she of course had not added any interloping honey to her recipe).  They also had a greater aniseed taste which we put down to the fact that she had used ground coriander, giving it a stronger flavour of coriander.  I wonder what Mrs Marshall would have made of our efforts? I imagine her as an 18th century Mary Berry, judging the technical challenge she’d set her girls; mine would definitely be marked down for their untidy, rustic appearance, but might have received a reassuring smile for a pleasing taste and an acknowledgement that a little bit of creative pantry searching was better than wasting all those valuable ingredients.

 IMG_5694

Mark’s York Cakes – the recipe contained no sugar

Other recipes which were tried for the evening were the seed cake – oh why did seed cakes go out of fashion, they are so tasty! , an iced rice cake – lovely and light, the delectable queen cakes, heart cakes (this one from MacDonald’s recipes), the pepper cake – a curious, paneforte like rich cake surely to be enjoyed with a good spirit, an almond cake and York cakes.

   IMG_5696

Peggy’s seed cake – such a good flavour

IMG_5697

Kathryn’s Pepper Cake; don’t be fooled by it’s chocolately looking colour – that all comes from the spices and treacle

We’re going to be taking a summer break, but I’ll be looking forward to the autumn and the chance to try out more of Mrs Marshall’s Young Ladies’ recipes ……

Cake shape and Bristol Fashion

27 Mar

Recipe for Bristol Cakes from The New London Family Cook, by Duncan Macdonald, 1808

IMG_5148

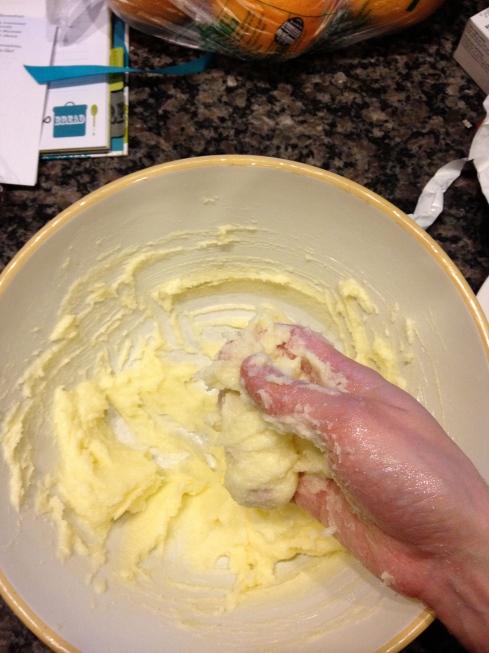
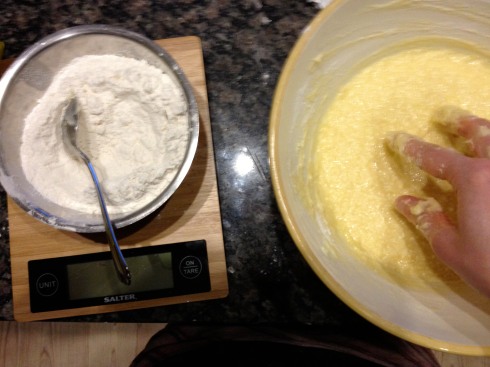
‘Mix with the hand, in an earthen pan, six ounces of sifted sugar, six ounces of fresh butter’

IMG_5149
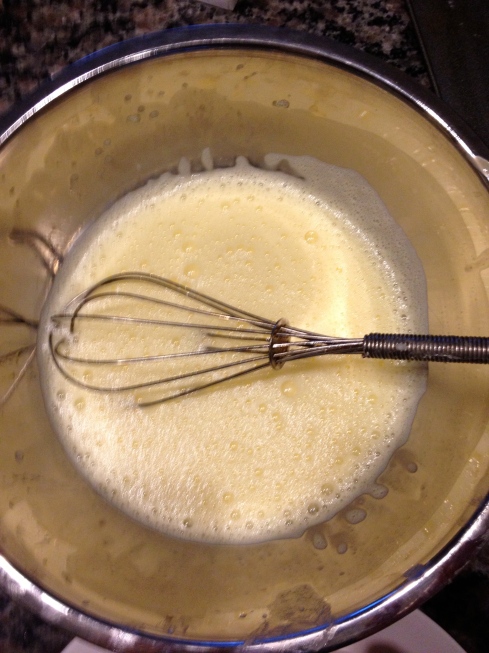
‘four whites and two yolks of eggs’

IMG_5150

‘and nine ounces of flour;’

IMG_5151

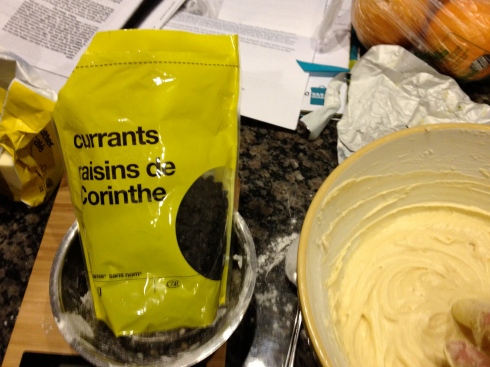
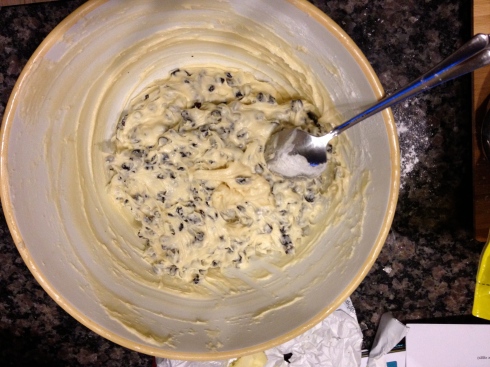
‘add three quarters of a pound of picked currants,’

IMG_5152

IMG_5153

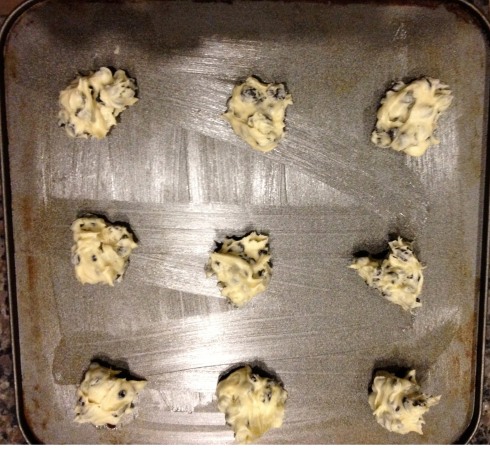
‘drop the mixture with a spoon on tin plates, rubbed with butter, ‘

IMG_5154

‘and bake it’

Learning your limes

24 Mar

IMG_5116

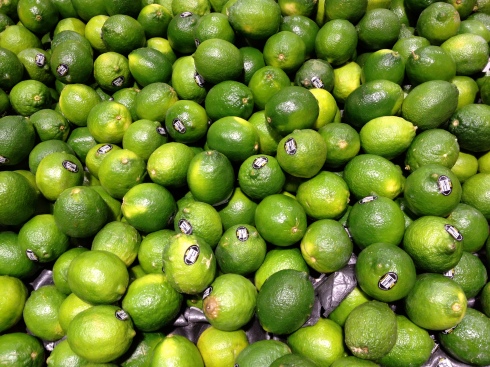
limes on sale in my local Loblaws grocery store

While we were preparing for the Mad for Marmalade, Crazy for Citrus event at Fort York this February I was struck by the fact that none of the recipes that we were testing included any limes.  As a commonplace citrus fruit into today’s kitchen it seemed like either a surprising or deliberate omission.  Bridget, the Heritage Food Programme Officer at the Fort, confirmed that it was the latter.  ‘Well,’ she said, when I asked her why we weren’t making any biscuits or cakes with lime in, the recipe, ‘it’s because they didn’t use limes for cooking cakes or biscuits in the 18th or early 19th century’.

So when do limes start to become part of the baking artillery?  Today it’s impossible to come across an on-trend cookery book without some sort of recipe for a delicate lime sponge or biscuits iced with a lime infused frosting (see for example the recipe for mini lime-syrup sponges in Nigella Lawson’s How to be a Domestic Goddess – p.242).  In fact it often feels as if limes are the 21st century sophisticated version of lemons, adding zest to sparkling water and gin and tonics, packing a punch in Mexican food or adding a sharp contrast to the sweetness of Vietnamese dishes at smart, upscale restaurants.  But I was interested to try and trace something of the lime’s culinary history.

IMG_5117

A gin and tonic with lime – the perfect end to a day

The fruit lime, as the OED defines, is ‘the globular fruit of the tree Citrus Medica, var. acida, smaller than the lemon and of a more acid taste; more explicitly sour lime. Its juice is much used as a beverage. Sweet lime n. Citrus Medica, var. Limetta.’ The OED’s earliest cited mention in English is in 1638 when T. Herbert writes in Some Yeares Trav. ‘The Ile [Mohelia] inricht us with many good things;..Orenges, Lemons, Lymes’.  The lime gets a brief mention in the epic poem The Task, by the 18th century writer William Cowper which talks about ‘The ruddier orange and the paler lime’.  As a cooking ingredient however it seems to get short shrift throughout the 18th and 19th century in England.  The only place where it seems to surface is when the juice is used in a beverage.  For example the London Gazette in 1704 talks about ‘A Parcel of extraordinary good Rum and Lime-juice’.  And in 1774 a P V Fithian records ‘We had after Dinner, Lime Punch and Madaira.’

IMG_5115

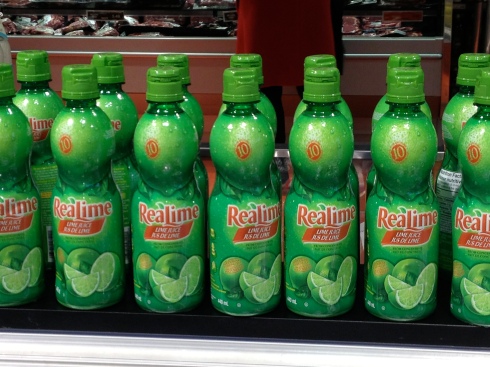
lime juice in the age of convenience shopping

Of course lime juice wasn’t only good as a mixer for alcoholic drinks.  The importance of lime juice to the British navy in the 19th century as a method of staving off attacks of scurvy for sailors going for long periods without fresh fruits and vegetables was so great that it earned sailors and by extension all Brits the sobriquet of ‘limeys’.  There’s a fascinating account of the complacency and misunderstanding which surrounded the use of lime juice (and that of other citrus fruits) to control scurvy on naval voyages on the Idle Words blog.
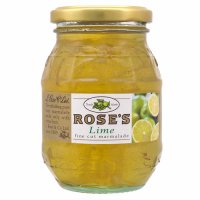
Lime takes time to emerge in other British culinary products.  For example it’s not until the 1930s that the reassuringly British Rose’s lime marmalade appeared. Interestingly the strength of the original Mr Rose’s business was built on supplying the British Navy with lime juice but it seems that it took him a number of years to experiment with it as flavour for marmalade.

LN_004520_BP_10

Rose’s lime marmalade, a nursery staple from the 1930s

In fact until relevantly recently the most likely mention of ‘lime’ in British cook books is likely to refer to the calcium oxide product, for use in cleaning and other household tasks.  Not the lovely vibrant green lime at all.  For example in Mrs Beeton’s 1861 Book of Household Management she advises that ‘To preserve bright Grates or Fire-irons from Rust’ one should ‘Make a strong paste of fresh lime and water, and with a fine brush smear it as thickly as possible over all the polished surface requiring preservation. By this simple means, all the grates and fire-irons in an empty house may be kept for months free from harm, without further care or attention.’
So back to the issue of limes in baking.  Perhaps the best known dessert recipe using limes is the iconic Key Lime Pie from Key West, Florida (anyone who watched last year’s Great British Bake Off will remember Ryan’s perfect Key Lime Pie that wowed judges Mary and Paul).  It appears that its it exact lineage has been clouded in the mists of time but most stories contain the following suggestion, that the dish originated with the cook of William Curry, the first millionaire of Key West.  The dessert used the distinctive key limes grown in the area (the 1926 storm wiped out most of the local production) and condensed milk.  The comparative isolation of the islands, without cows, meant that the only source of milk was the sweetened condensed milk, first made available by canned condensed milk in mid 19th century before the advent of modern refrigeration.  As many of the websites I looked at suggested, the smaller key limes are very different from the more familiar vibrant green lime variety and a true Key Lime Pie should be tinged a delicate yellow, not a strong green colour.

The difficulty comes when you try and pin down the first written Key Lime Pie recipe.  I’ve been looking for a number of days now without success.  A number of sources suggested that I wouldn’t have any success pre-1930 and so I began looking at a number of American classics from The Joy of Cooking and Fannie Farmer’s Boston cookbook to James Beard’s American cookery.  None of them contains a recipe for Key Lime Pie.  The very helpful woman in the Cookbook Store, Toronto pointed out to me that it might well be that the recipe first appeared on the back of a condensed milk tin.

In fact finding any recipe using limes for much of the 20th century is tricky.  I felt hopeful when I looked at the promisingly titled Zestful recipes for every meal: Pure Gold and Silver Seal oranges, lemons, grapefruit published in California sometime in the 1930s by the Mutual Orange Distributers.  Alas, no lime recipes. When you do fine pre-1950s lime recipes they tend to be for cocktails or for marinating fish. For example The Modern Cook Book for the Busy Woman, by Mabel Claire, published in 1932 contains a recipe for a lime rickey and a non alcoholic lime cocktail.  Mrs Vaughan Moody’s 1931 Cook Book tells you how to make a lime sherbet with 12 limes and a Hawaiian cocktail to marinate fish with limes.  The Patio Cook Book from 1951 includes Joe Tilden’s Garlic Sauce (created we’re told by one of California’s most famous amateur chefs) which incorporates lime to create a sauce perfect for French bread, fish or jacket potatoes.

By this point I was beginning to feel really despondent – where was I going to find any written proof of the beginning of our love affair with lime as a baking ingredient?  Well, my perusing on a local bookshop shelf of American cookbooks did reveal something slightly more helpful.  A reprint of the first Betty Crocker’s Picture Cook Book from 1950 contained a range of lime recipes; its Lime Meringue Pie recipe was contributed by a member of staff from Florida (could this be a Key Lime Pie in disguise?) and it was accompanied by a Lime Cake Pudding and a Lime Chiffon Pie.  At last, the lime seems to have made its mark on the baking scene!

There’s plenty of gaps in this culinary account of limes, especially in terms of their use in Mexican, Indian and south East Asian cooking (one of my favourite discoveries in Singapore last year was lime juice, refreshingly sharp, with just a hint of sweetness below, the perfect drink for a bakingly hot day).  I would love to be presented with an earlier recipe using limes in the baking of something sweet.  And please, please do let me know if you come across a recipe for Key Lime Pie pre-1950.  For this amateur historic cook there’s plenty more lime learning to do.

Un grande bacio

17 Feb

IMG_4368

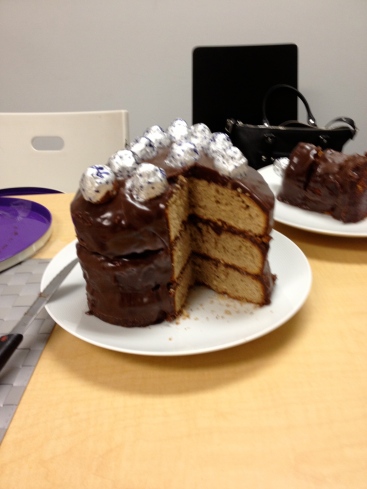
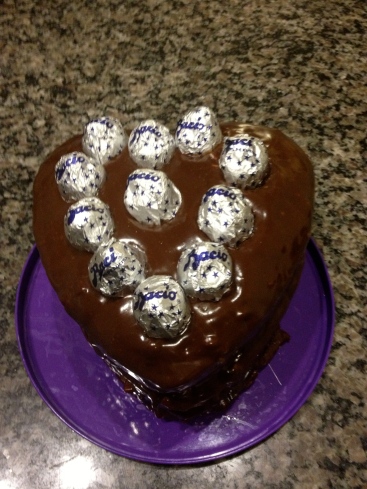
The monster Baci cake! 


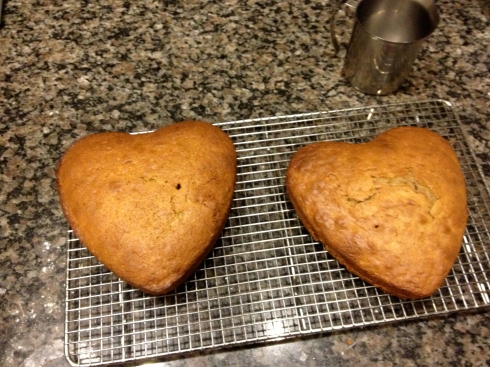
As I mentioned in an earlier post I’m particularly fond of Perugina’s Baci chocolates.  I was delighted when on honeymoon in Sicily around Easter time to find that Baci Easter Eggs are readily found and it was in Italy that I first became acquainted with the Baci cake, a light sponge with pockets of Gianduia filling and covered in chocolate, to imitate the flavour of a Baci chocolate.  However, even though buying one of these would be the easiest way to sample Baci in cake form ever since seeing the Baci cake recipe (scroll to the bottom of the page) on the Baci Canada website I’ve been wanting to test it.  Whereas the shop bought cake is made to look like a giant, unwrapped Baci the recipe suggestion on the website was for a heart shaped cake, topped with Baci in their sparkling silver wrappers. It seemed like the perfect recipe to experiment with on Valentine’s Day – what chocolates are more suited to Valentine’s than Baci with their little love notes and logo inspired by the romantic 19th century painting, The Kiss.    On closer inspection however it was clear that I’d need to give the recipe a bit of a tweak.  There were a few elements which were not clearly explained on the website and the generous quantities of ingredients listed for the sponge would have made a cake to feed an entire Italian wedding.  So I halved the quantities of ingredients for the sponge and added some praline chocolate to the mixture.  Even with this alteration the batter still made three generous heart shaped layers in a tin, c.18cm in width.  Instead of making one batch of ganache and covering the cake in melted chocolate I made a double layer of ganache to cover the whole cake.

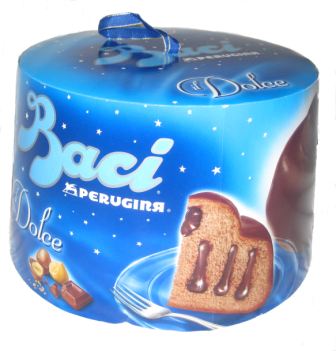
 bacidolcecake

Baci cake as you buy it in the shops.  You can see from the profile slice that it’s meant to look like a giant Baci. 

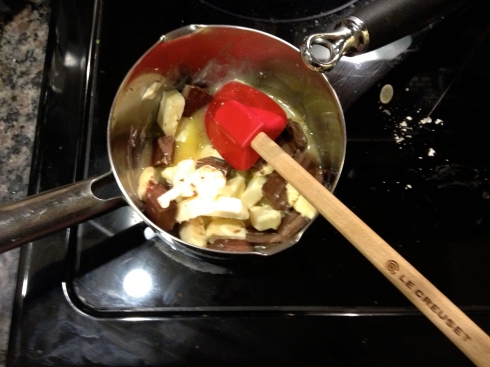
IMG_4362

melting the butter and chocolate

It was only once I’d begun the process of putting the cake together that I noticed quite how large it was going to be. I’d already cut down the layers of the cake so that they would stack better; in retrospect I should probably have shaved off a little more.   With its three layers it was beginning to rival the Empire State Building for height. Adding the Baci chocolates on the top was like giving the cake an extra layer.  Even my largest cake tin wasn’t big enough to take the cake.  I had to hold the top in place with sellotape and then work out a way of transporting it.  I’d created a monster Baci cake!  I didn’t make a very job of decorating the cake and a s consequence there are no photos of this stage in the cake’s creation; I was too busy considering whether it would be or wouldn’t be acceptable to show anyone, let alone ask them to taste such an oversized, Frankenstein of a cake.  It didn’t help that  my ganache mixture was a little on the runny side and so didn’t stick to the cake quite as effectively as I had hoped.  If I’d trimmed the sponge layers too, I’d have had a much neater looking cake.

 IMG_4365

The first two layers of the cake, if only I’d stopped at two!

IMG_4367

Too big for the tin; thankfully I could rest the lid on the decorative Bacis and it reached Mr Kim’s office in one piece. 

Once again Mr Kim’s work colleagues graciously agreed to sample my baking experiment.  It turned out that it was the last day for one of Mr Kim’s colleagues so the cake doubled as both a late Valentine’s treat and leaving cake.   Then I was able to find out if its flavour really matched that of a Baci chocolate.  The contrasting layers of light sponge and ganache looked very effective but I’d overcooked the sponge layers and that they were a little on the dry side. The overall taste of the cake though worked really well and despite all the hazelnut flour in the sponge and the praline chocolate the taste of hazelnut wasn’t overpowering. Despite being sampled by the office such was the size of the Baci cake it felt like we’d barely made a dent.  If you need to feed a small army or express to your nearest and dearest the monumentality of your love in cake form, then this is the cake for you.  As it says on one of the Baci love notes ‘Every great love begins with a kiss’ (Anon).  And this cake is definitely one big kiss!


In case anyone is interested in trying this cake below is my altered recipe.


For the cake

Flour 275g (I’d use self raising in the UK)

Potato starch 100g

Hazelnut flour 200g

Melted butter 150g

Egg yolks 50g

Whole eggs 450g

Caster sugar 325g

Praline chocolate 100g


For icing

Whipping cream 200g

Praline chocolate 400g

Dark chocolate 30g

Chopped hazelnuts 70g


To decorate

10 Baci perugina


Method

1. heat the oven to 200˚C (390˚F)

2. mix together the hazelnut flour, the flour and potato starch

3. beat the whole eggs, egg yolks and sugar until well blended

4. melt the butter and chocolate slowly

5.add the melted butter mixture to the eggs and sugar

6. add the flour a ½ cup at a time

7. pour 1/3  of the mixture into a 18cm heart shaped tin and cook for c. 30 mins

8. cook three layers of the cake and leave to cool

To make the ganache

  1. bring the cream to a boil.  Remove it from the heat and add the chocolate in small pieces.
  2. Keep stirring the mixture until all the chocolate has melted
  3. Add the chopped nuts

To finish the cake

  1. sandwich the layers with the ganache
  2. cover the top of the      cake and sides with the remaining ganache
  3. add Baci to the top

intro-prodotti-foto-baci

Let them eat gingerbread

14 Feb

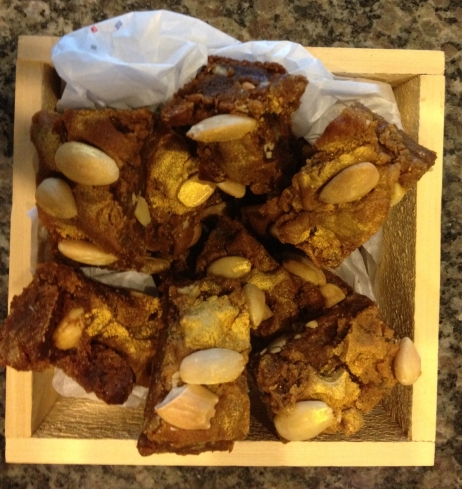
gingerbread in box


One of the many recipes I’ve meaning to try for some time is one sent to me by my secondary school history teacher, Mrs V.  It’s a Dan Lepard from the Guardian newspaper at about the time of the Queen’s Diamond Jubilee last year and although it doesn’t give an historical source for the gingerbread recipe its rich, treacly texture and heady mix of spices seem resonant of a past era when such a combination of costly ingredients would have made it a luxurious treat.

Gingerbread, which the OED defines as ‘From the 15th c. onwards: A kind of plain cake, compounded with treacle, and highly flavoured with ginger. Formerly made into shapes of men, animals, letters of the alphabet, etc., which were often gilded’ is a sweetmeat with a long history, appearing in both Chaucer and Shakespeare.  The earliest instance of its use in the OED dates from 1299 when it’s mentioned in the Durham MS. Burs. Roll, ‘In ij Gurdis de Gingebrar’.  And although as its name suggests most gingerbread recipes were flavoured with gingerbread this was not always the case.  Another of the OED quotations dates from 1430 and Two Cookery-bk,s ‘Gyngerbrede. Take a quart of hony..Safroun, pouder Pepir..gratyd Brede’ – no mention of ginger here!

The food historian Ivan Day has an excellent page on his website exploring Lady Barbara Fleming’s recipe for gingerbread from 1673, where the dough is given an intense red colour from sanders, the wood of the sandalwood tree.  Ivan gives a number of different gingerbread recipes and illustrates how it gradually changed from being an almond paste, breadcrumb based recipe to one more commonly made using treacle and flour.  Dan Lepard’s recipe uses both treacle and flour but other ingredients like honey and chopped peel hark back to some of the older, pre-Victorian recipes.

Dr Johnson’s 1755 definition of gingerbread is close to that of the OED ‘A kind of farinaceous sweetmeat made of dough, like that of bread or biscuit, sweetened with treacle, and flavoured with ginger and some other aromatick seeds’.  One of the innovative aspects of Dr Johnson’s dictionary was the vast number of quotations he included, to illustrate how words were used in speech, and as well as quoting from Love’s Labour Lost (‘An’ I had but one penny in the world, thou should’st have it to buy gingerbread’) he also quoted Jonathan Swift, ‘Tis a loss you are not here, to partake of three weeks frost, and eat gingerbread in a booth by a fire upon the Thames’.  Swift’s quotation conjures up a vision of crisp winter air, jangling bells and the raucous shouts and laughter of London enjoying a great frost fair, warmed by tankards of hot ale and firey gingerbread.  In a similar suggestion of conviviality Dan Lepard suggests that his gingerbread is ‘ever so good cut into small diamonds to serve with brandy after dinner.’

The regal and showy qualities of gingerbread have deep roots and it was often gilded which W King in his 1708 Art of Cookery poetically describes as ‘The enticing Gold on Ginger-bread’.  Another long gingerbread tradition is that of shaping forming the dough into shapes, often human figures or alphabet letters, with a knife, cutters or elaborate moulds.  In Cowper’s Table Talk, scorning mere showy possessions, he rhetorically suggests ‘As if the poet, purposing to wed, Should carve himself a wife in ginger~bread’.

It’s highly appropriate that Mrs V should pass on a historically based gingerbread recipe to me since I am the student who tortured her history class with the products of my experimentation with a medieval gingerbread.  I always enjoyed Mrs V’s lessons (earlier in my school career she taught me English) and her engaging and thought provoking teaching strengthened and nurtured my love of history and helped to confirm it’s what I wanted to study at university.  From the Frondes of 17th century France to the enlightened despotism of Joseph II (discuss) the lessons swung their way through early modern European history with regular tangential discussions about Mrs V’s exciting birth (in Coventry during the Blitz) to the depressing frequency of greengrocers’ apostrophes.  All of this helped to install in me a belief in the importance of the seemingly insignificant, especially when it came to history.  I was fascinated by the social minutiae of the lives of peoples past, how they did things, what did it sound, taste, feel like?  Given my love of social history and baking it was perhaps unsurprisingly that I used my classmates and Mrs V as guinea pigs for my attempt at this medieval gingerbread recipe.  I remember that its base mixture of breadcrumbs and honey didn’t look particularly appealing as I made it.  This was then flavoured with spices and divided into two, with one half coloured an alarming red.  The idea was to roll it out, cut into squares, bake it and then arrange it in a chequerboard pattern.  Quite how I presented it, or where exactly I found the recipe, I can’t remember but the look of forced enjoyment on the faces of my history class as they struggled to swallow my strange historic creation I will not forget.

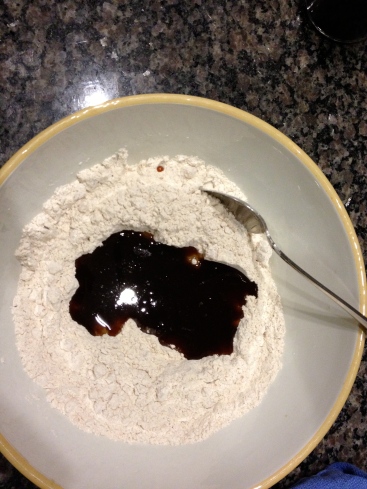
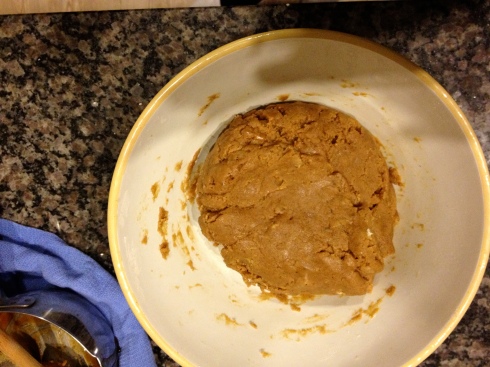
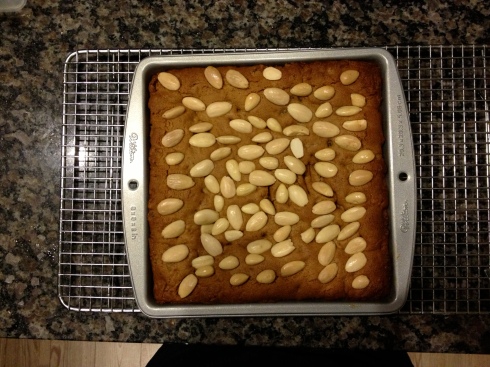
Happily I had far more success with Dan Lepard’s recipe; it was a delight to prepare, with wafts of ginger, mace and cinnamon dancing in the air, and the pleasure gained from watching the ingredients combine into a dark, rich dough.  It was also very straightforward; once the dough was formed it’s just pressed into a baking tin and stuffed with almonds (Dan suggested cutting them in half but I just stuck mine in whole).

IMG_4335

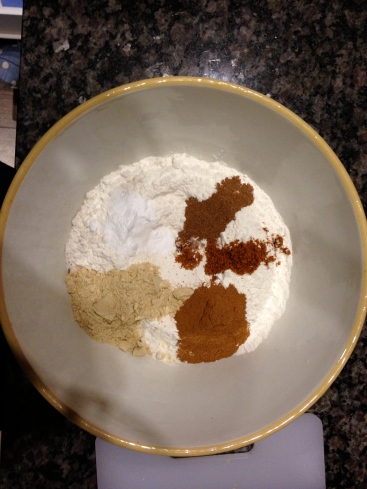
flour, sugar, ginger, cinnamon, mace, nutmeg

IMG_4336

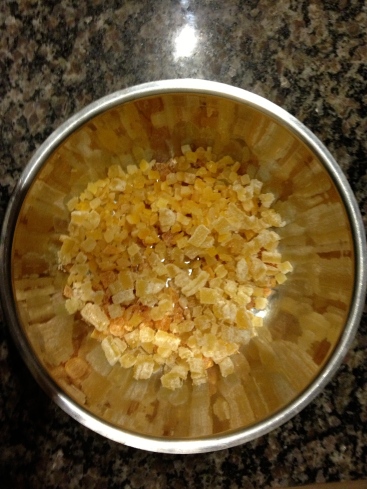
apricots, peel and ginger

IMG_4337

flour and treacle mixture

IMG_4338

gingerbread dough ready to go

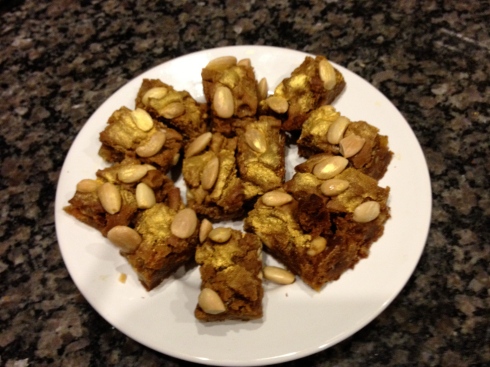
Dan explains in the introduction to his gingerbread recipe that you should expect a dense texture, like a paneforte, and as they bake the apricots, candied peel and ginger melt into the honey and molasses.  The resulting gingerbread is intense, chewy and very moreish.  I haven’t any brandy to try it out with yet but I’ve found it difficult to stop myself taking another slice.  In texture and taste it reminds me of the wonderful Grasmere gingerbread from the Lake District.  And while my cutting of the gingerbread was hardly sufficiently well executed to be fit for a queen, a touch of gold dusting powder not only gave it a certain regal air but also offered a contemporary nod to the fabulous tradition of gilded gingerbread

IMG_4340

     the gingerbread out of the oven 

IMG_4342

not quite the diamond shape Dan Lepard suggested but given a bit of extra sparkle with some gold powder

Seafood and sesame- a Korean take on Shrove Tuesday

12 Feb

I’m a big fan of pretty much every type of pancake from the classic English sugar and lemon drenched pancake to thin and crispy French crepes (a friend has introduced me to a great creperie, Crêpes à GoGo, just opposite Toronto Reference Library).  One of my most vivid memories of living in Germany as a child is eating crepes filled with chocolate and nuts (and managing to end up with chocolate all round my mouth and on my nose too!) in the chill cold and excitement of Aachen’s Christmas market.  And one of my favourite breakfasts is Mr Kim’s light and fluffy American pancakes bursting with blueberries and swirled in maple syrup accompanied by crunchy bacon.  In fact such is my enthusiasm for this breakfast that when we moved to Canada last friends jokingly suggested that we might have been involved in the great Canadian maple syrup heist.   More recently Korean pajeon have been added to my pancake lexicon.  Pajeon are savoury pancakes with spring onion and then a whole range of other ingredients depending on taste.  They’re often made fairly small, 8cm d., and served with soy sauce.

IMG_4330

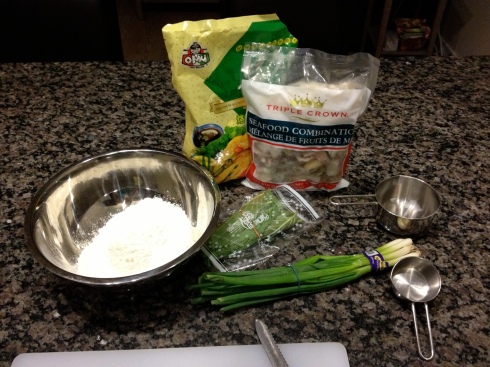
The ingredients for the pajeon; pajeon mix, seafood, sesame leaves and spring onions

IMG_4331

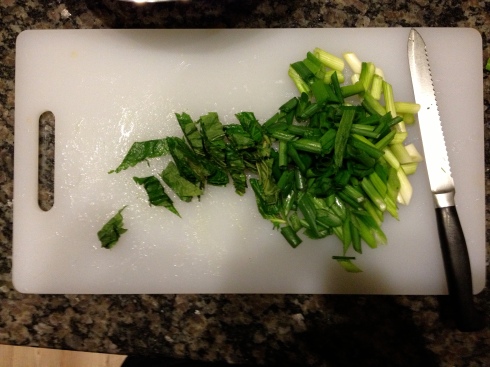
The sesame leaves and spring onions are chopped up

Since I’m by myself this Shrove Tuesday I decided that pajeon would be a good choice for marking the occasion (something English or American pancakes don’t work solo – I’m no good at making up batter for just one person).  Pajeon work well being made in advance and then heated up whenever you want to eat them. My Shrove Tuesday pajeon were made with spring onion, sesame leaves (I love the taste of these) and seafood, and the mixing was made particularly easy by using ready to make pajeon mix.  I’d been taught how to make them with my mother-in-law last October so now was a great time to practise.  There might not be any flipping involved but I still wanted to make sure that I got them right.

 IMG_4332

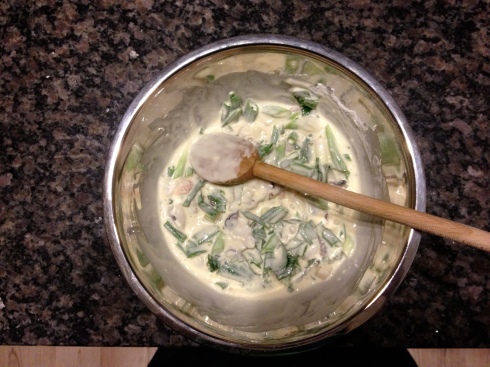
A cup of water is added to a cup of pajeon mix and the sesame leaves and spring onions are added along with a couple of cups of seafood mix

IMG_4333

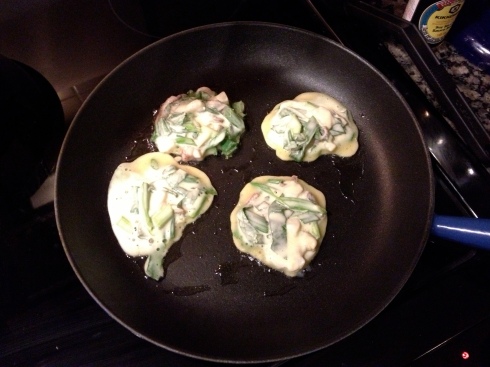
Using a quarter cup measure the pajeon are placed in a frying pan on a medium heat and given a few minutes on each side, so that they are nicely brown.  It’s worthwhile squashing them down so that the middle is definitely fully cooked.

One of the aspects of Toronto which particularly struck us when we arrived was the size of the Korean population, which means finding and eating Korean food in Toronto is so much easier than in the UK.  Our favourite Korean restaurant in England is Hamgipak in New Malden who make delicious pajeon and if you want to try making pajeon yourself you might be able to find the pajeon mix in a south east Asian grocery store, like Thong Heng in Oxford. Otherwise a straightforward English pancake batter with the addition of spring onions and prawns would make a pretty good equivalent.

 IMG_4334

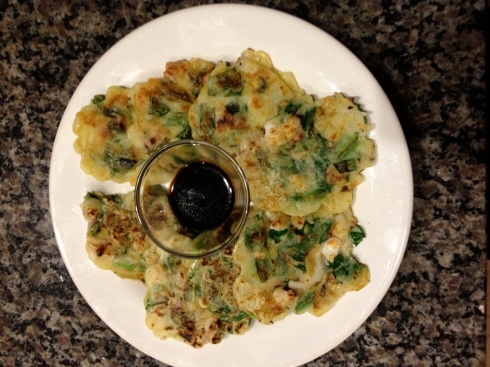
The finished pajeon served with some soy sauce

Happy Pancake Day!


The key to good bread

8 Feb

IMG_4151

St Peter with his key, watching over his bakery

A cold, wet February morning does nothing to lift the spirits, especially when you’re in Salzburg and have been hoping for a picturesque covering of snow and fine, crisp weather.  What a difference a visit to a bakery can make, especially when the bakery in question has been in existence since 1160 and greets customers with the tempting smell of freshly baked bread well before you’ve stepped inside.

I was in Salzburg as part of an ICOM Costume Committee group working on a project to produce a web based resource for making the most of costume collections in museums.  When you’re going to spend a day deep in discussion and debate over formats and contents an early morning visit to a such bakery provides not only edible sustenance but also a ver welcome psychological boost.  We needed no encouragement from our host Dorothea to take up her suggestion of a pre-meeting visit, especially as she explained to us that often on a cold winter’s morning she would use a loaf of St Peter’s bread as a sort of edible hot water bottle, pressed tightly to her coat as she walked back home.

 IMG_4147

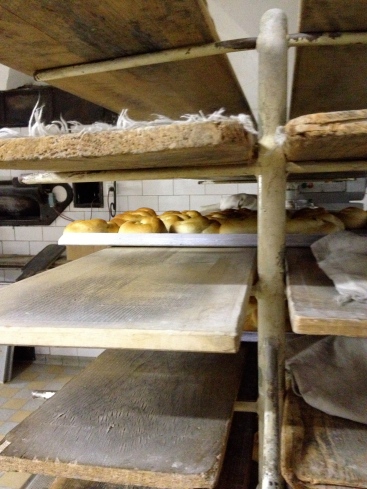
baked rolls at Stiftsbäckerei

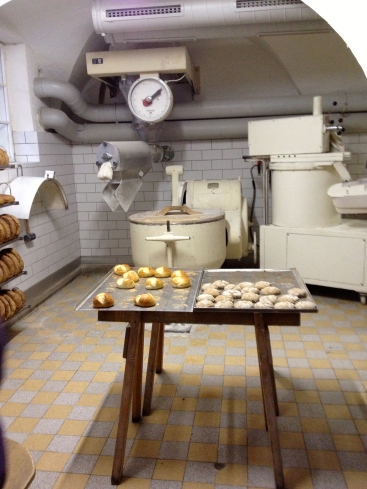
Stiftsbäckerei St. Peter is the monastery bakery, just a little to the west of St Peter’s church in  the heart of Salzburg.  For the past eight hundred years or so it’s been producing bread in its wood fired oven, with the monastery mill powered by a waterwheel, that happily churns and roars at the entrance to the bakery.  The bakery’s current simple interior bears little signs of change since the 1950s; boards of loaves ready for the oven waited on shelves, while the sturdy and dependable looking bread mixer dated from an age before computer technologies.  Bread is baked and sold in the same room, allowing the customer to enjoy not only the aroma of the newly baked bread, but also whole process of bread making from the mixing to baking.

IMG_4146

The bakery interior with a range of the different breads and rolls produced and the mixer in the background

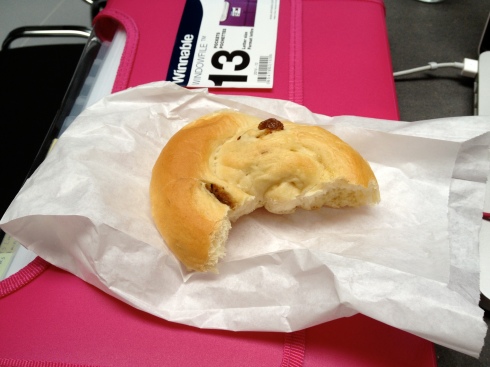
The main product of the monastery bakery is a wholemeal sour dough loaf, developed from the bakery’s own sourdough starter and rye flour.  This wholesome and hearty loaf comes in a range of sizes – ½, 1 and 2 kgs and is priced uniformly at 2.95 euros per kg.  Something about its very rustic solidity seems to encapsulate the longevity of bread baking on the site and offers a very edible reminder of the bakery’s history and purpose.  Since I wasn’t in a position to try taking one of these loaves home, however, I went for another of the bakery’s products, a brioche roll, beautifully soft and studded with raisins.

IMG_4153

my brioche roll, perfect for elevenses!

St Peter’s Abbey in Salzburg was founded in 696 by Saint Rupert (we were staying in buildings belonging to the monastery, now smart visitor accommodation) and the monks probably had some way of producing their own bread early on in the Abbey’s history but it was in 1160 that the monastery mill was established near the Abbey’s cemetery (the abbey church was established in 1147).  The mill survived in the building until 1967 and the wheel was refurbished in 2006, so that once again the bakery uses water power, and generates enough energy to feed it back into the public grid.  It’s great to think that a bakery first established to provide the monastic community of St Peter’s with good, wholesome bread, today not only offers the wider community of Salzburg the fruits of its rich bread making tradition but also gives back all the surplus power generated by its waterwheel.  A heart warming thought for a cold and grey February morning.

IMG_4150

The bakery waterwheel in full flow

IMG_4149

Oranges and Lemons

6 Feb

Oranges and lemons,
Say the bells of St. Clement’s.
You owe me five farthings,
Say the bells of St. Martin’s.


Traditional English nursery rhyme

Cooking at Fort York has taken a decidedly citrus turn over the past few weeks, since we’ve been preparing for the Fort’s long running February event, Mad for Marmalade, Crazy for Citrus.  I’ve long been a lover of citrus fruits – as a child oranges and lemons were basically the only fruits I’d eat – so the idea of celebrating the flavours of sweet oranges and sharp lemon zest is one which appeals to me greatly.

IMG_4232

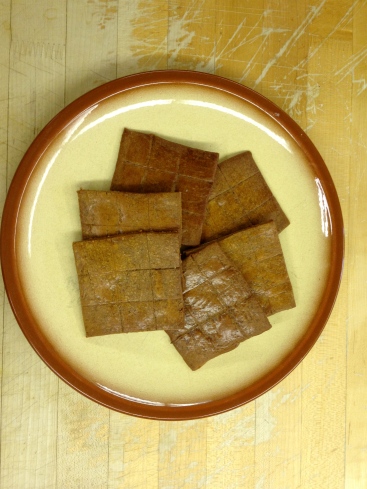
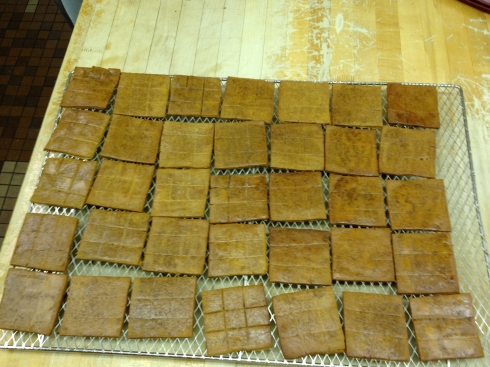
Orange gingerbread squares

It’s a pity I won’t be around for the event itself but at least I get the fun of all the behind the scenes preparations and experimentation.  Rosemary and Joan have been working on orange biscuits, perfecting the consistency which is key to these macaroon like offerings.  Of course in the interests of achieving the best possible biscuit there needs to be a fair amount of testing by eating, a task in which we’re all more than happy to take part.

For at least two weeks in a row Emma has produced the most delectable lemon puffs, pillows of airy fluffiness offering the briefest wisp of tart lemon before melting away.  We’ve been imaging the many permutations for serving lemon puffs, including sandwiching them together with a swirl of lemon curd and cream.

The recipe I’ve been working on, with Krystle, was an orange gingerbread taken from the first known English language cookbook published in Canada, in 1831, The Cook Not Mad.  The author of the cookbook is unknown and before being published in Canada it actually first appeared in America, in Watertown, New York in 1830.   Its title clearly suggests that its author wanted to demonstrate the rationality behind cookery, as opposed to it being any sort of mystic alchemy.

No. 130 Orange Gingerbread
Two pounds and a quarter fine flour, a pound and 3 quarters molasses, 12 ounces of sugar, 3 ounces undried orange peel chopped fine, 1 ounce each of ginger and allspice, melt twelve ounces of butter, mix the whole together, lay it by for twelve hours, roll it out with as little flour as possible, cut it in pieces three inches wide, mark them in the form of checkers with the back of a knife, rub them over with the yelk of an egg, beat with a tea cup of milk, when done wash them again with the egg.

The recipe, No. 130 in the book, is for a classic hard gingerbread with a melting of molasses and butter.  The combination of spices – all spice and ginger – is augmented by the addition of orange peel, which is what makes this a little more unusual than the standard gingerbread recipes of today.  There has been much discussion in the kitchen about they original recipe instruction to add ‘undried peel, chopped fine’ and what it actually means.  Is it simply orange zest or is it a peel in syrup then chopped? While the historic recipes when read carefully give many clues about their methods and ingredients, sometimes even close examination cannot unlock all their meaning and the best approach is to take an educated guess in the service of experimentation.

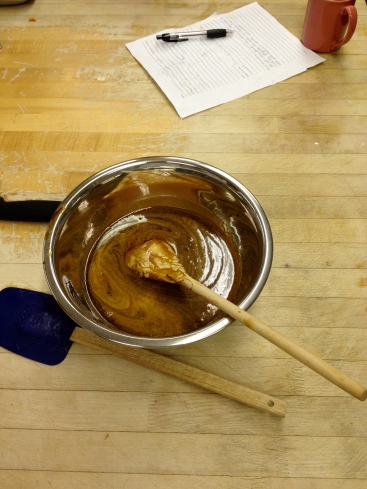
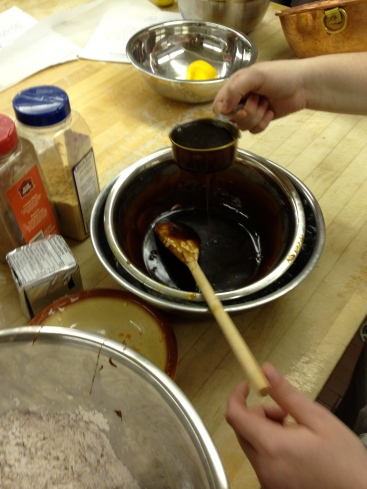
The melted molasses (fancy molasses, a little more refined that the usual molasses) and butter had to cool to room temperature and we began by simply stirring the mixture.  Elizabeth suggested that a cool bain marie and sure enough a bit of ice and water was much more effective in dropping the temperature.

 IMG_4107  IMG_4110

our molasses and butter mixture before and with the bain marie

IMG_4108

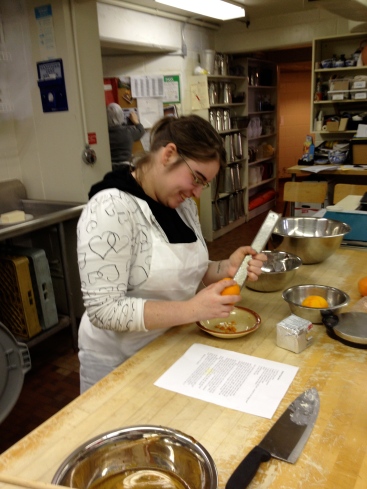
Krystle preparing the all important orange zest

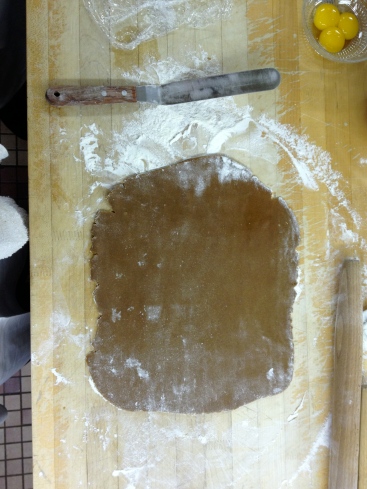
The cooled molasses mixture was added to the flour, sugar, spices and orange and then combined to make a soft dough which needed considerable chilling before it could be worked.  Even once chilled it still stuck to the table frequently while being rolled out; no wonder the original recipe suggested chilling it over night.

 IMG_4109

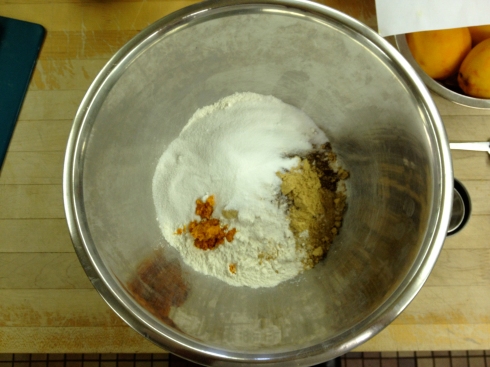
The dry ingredients – flour, sugar, ginger, all spice – and the orange zest

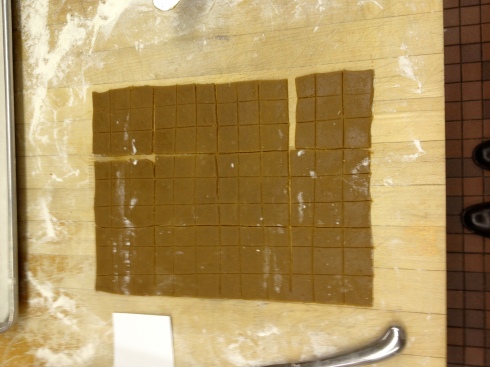
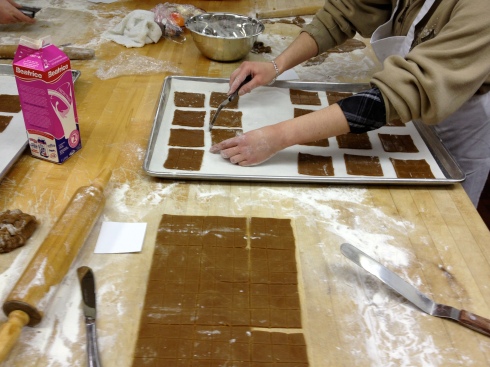
The recipe also gave very specific instructions about how to shape the gingerbread; it was to be rolled to ¼ “ thick and then marked in a chequerboard pattern of 1” squares, before being cut into squares of 3”.  While undoubtedly producing a biscuit pleasing to the eye this was not so easy to achieve; the dough was difficult to lift up and transport to the trays without suffering more than a little shape shifting.  These were quickly given a little bit of manual coaxing to regain their right angles.

To cut the squares we had a basic square template and we experimented with different methods of scoring the 1” squares; sometimes before cutting into 3” squares, sometimes once they were on the tray.  In the interests of speed I adopted a rather cavalier approach, just running my palette knife through the dough after cutting but before placing on the tray, making sure not to run my knife all the way through the dough.  My accuracy left much to be desired; I definitely wasn’t producing nine perfect 1” squares on each biscuit – I don’t know how precise the author would have expected their readers to be.

 IMG_4113

all ready for cutting

IMG_4115

                                Hardly a model of mathematical precision, but that doesn’t effect the taste, does it?

The finished squares were glazed with a mixture of beaten egg and milk and then left to stand for 30 minutes before being placed in a moderate oven.  After about 15 minutes they came out again and were given a second coating of the glaze before being left to cool and harden.

IMG_4116

The resulting biscuits have a pleasing crunch as you break the biscuit, with a hint of chewiness as you enjoy the deep, rich flavour of the marriage of molasses, orange and spices.  It’s difficult to know if we chose the right method of adding the orange peel  but they taste great.  In the cold and bitter weather of February it’s easy to imagine how much they must have been enjoyed by those who first made them, providing a little bit of sweet sustenance.

IMG_4233

The squares have two coats of an egg yolk and milk glaze

IMG_4234

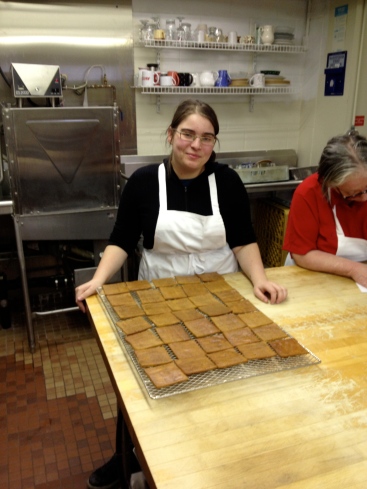
 Krystle with the finished squares